

Original Post


[Art] GIMP 512 head texture making tutorial
Hello guys, I'll be making a head while writing down the instructions and uploading screenshots of my progress, the program that I will be using is GIMP but I advice using Photoshop once you get the hang of this. There will be screenshots in the spoilers and I recommend viewing each and every one. This head will not be the greatest you'll make, but you'll learn new skills to enhance your current work.
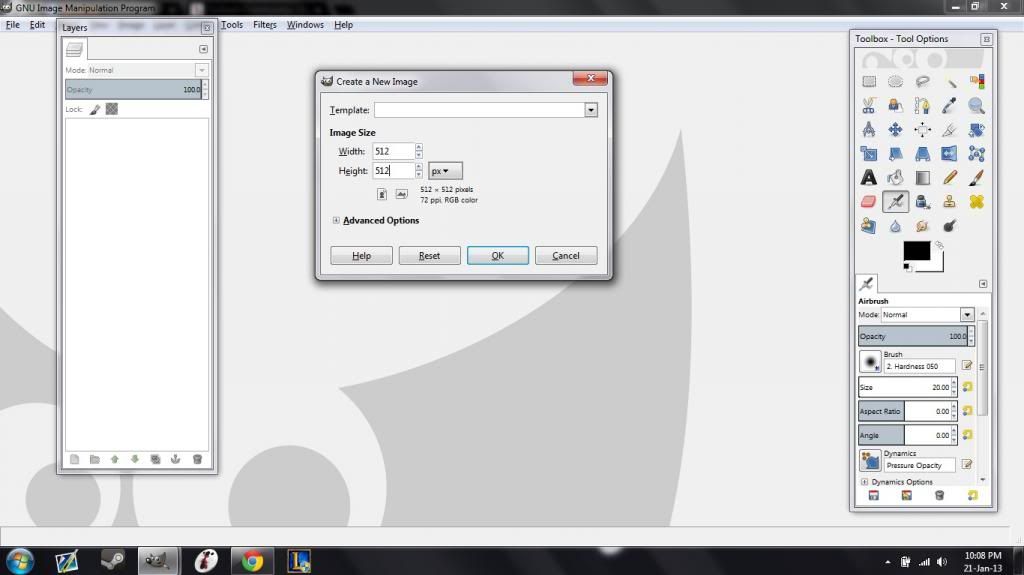
Step 1. Open up a new document and have it 512x512 pixels with everything else as default settings.
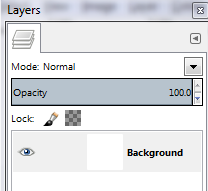
Step 2. Double click on the word 'background' (shown in the picture) and rename it to 'Skin' for easy reference.
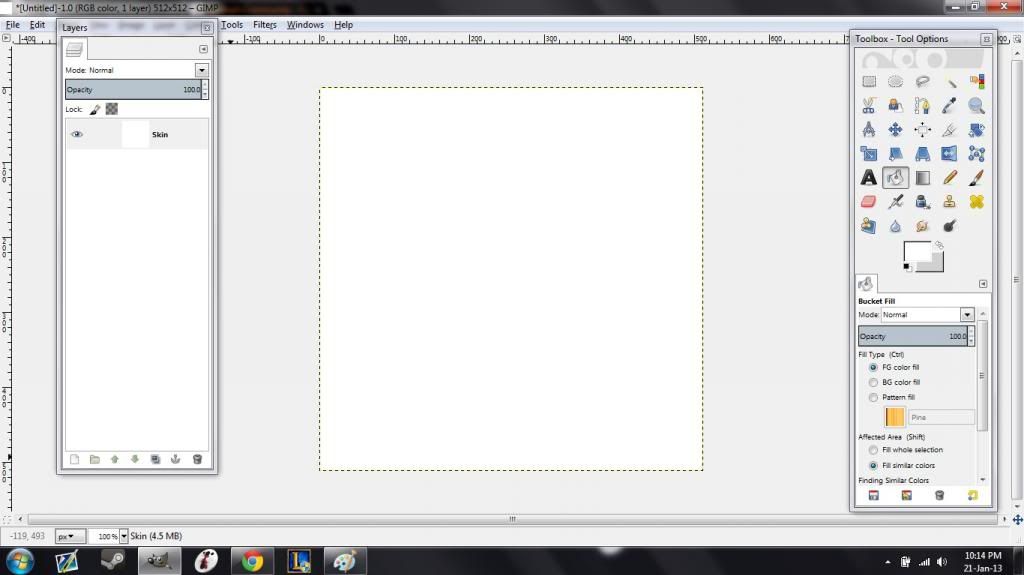
Step 3. Fill the skin layer with any solid colour. For the purposes of this tutorial, I'll leave it white.
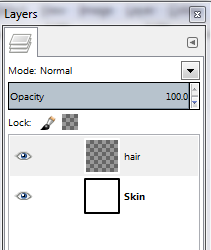
Step 4. Create a new layer called 'hair', don't change any settings except for it's name.
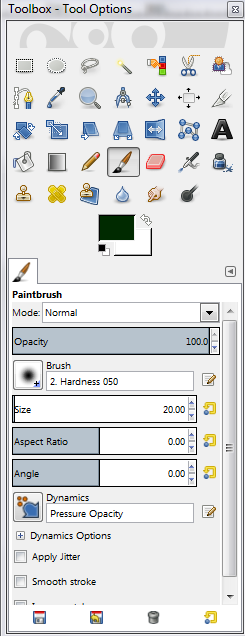
Step 5. Select the paintbrush and pick the colour you want your hair to be.
Step 6. Scroll down the settings of your paintbrush until you see 'smooth stroke'. Enable 'Smooth stroke' and put 'Quality' to 100 and 'Weight' to 250.
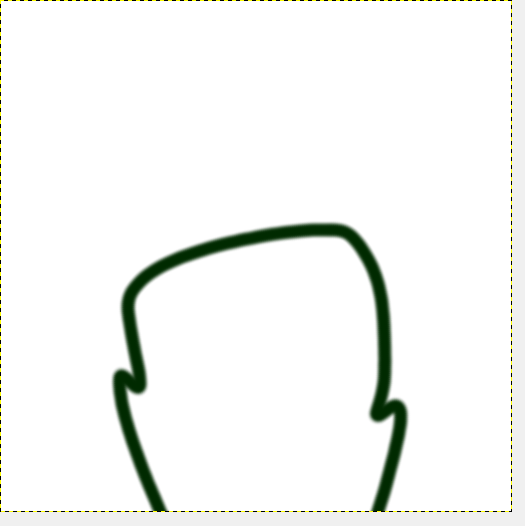
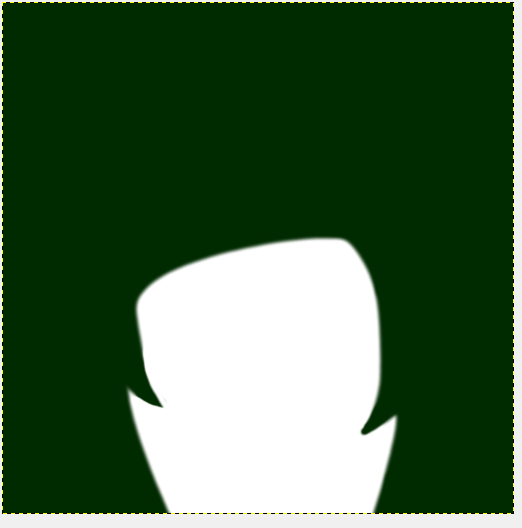
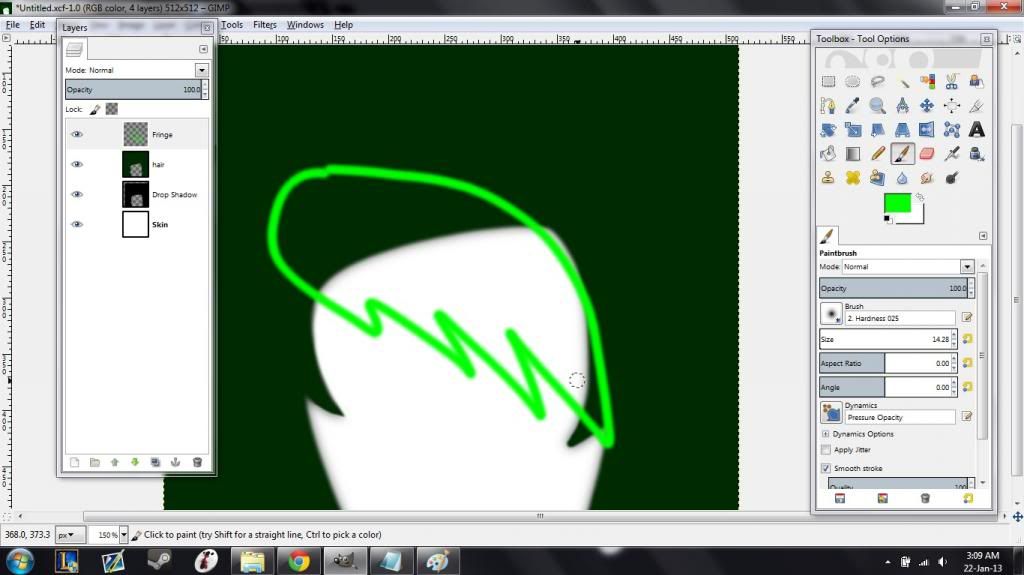
Step 7. Now that we have a nice smooth brush, draw the outline of the hair in one movement. Look at the picture below for reference. Remember, if you want it to be smooth then don't let go of the mouse until you finish it in one go. But you won't get it perfectly in your first try so CTRL+Z is your best friend.
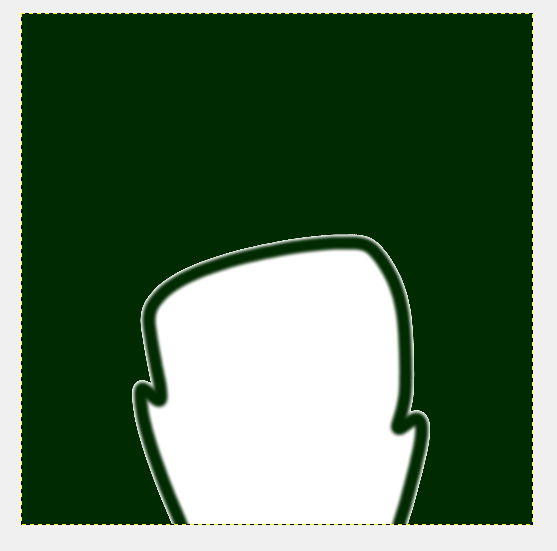
Step 8. Go ahead and fill in that hair with the paint bucket. Don't worry if some white pixels are still left.
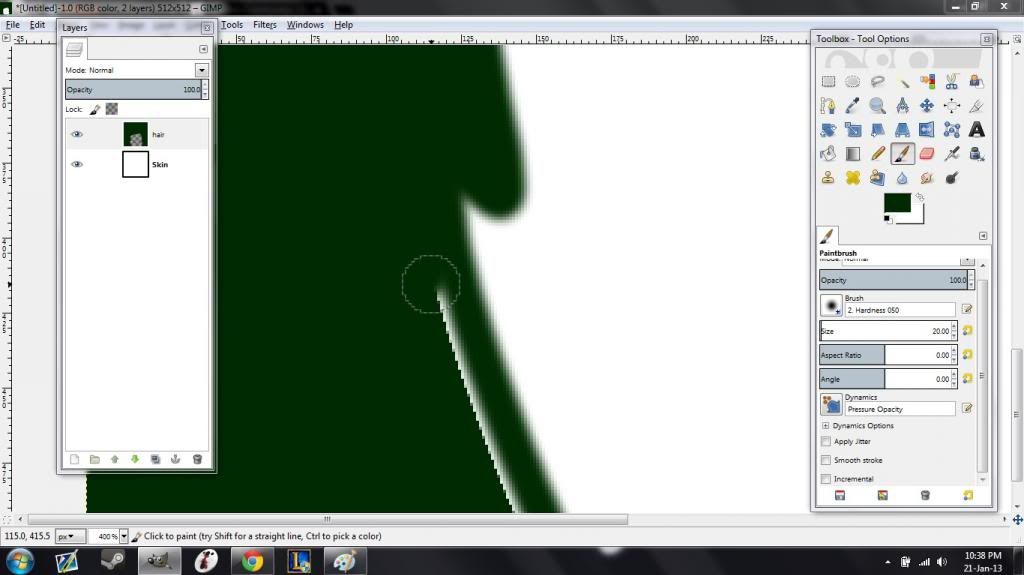
Step 9. Switch back to the paint brush and turn 'Smooth Stroke' OFF, that will make it easier for you to fill in the white pixels.
Changing the brush to a smaller size and zooming in helps.
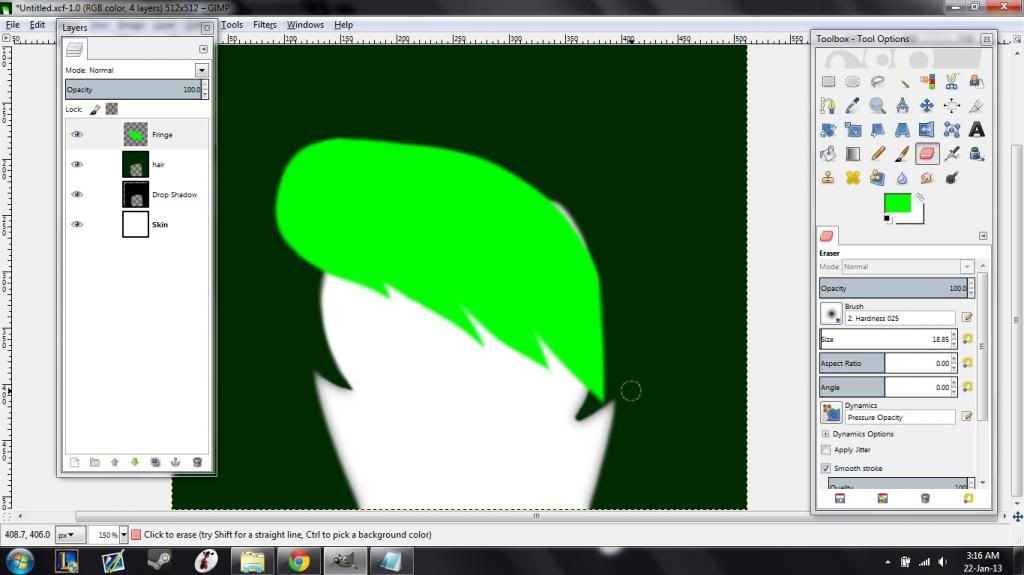
Step 10. (OPTIONAL) If you want, you can make the brush smaller and sharpen the edges of the strands of hair like I've done.
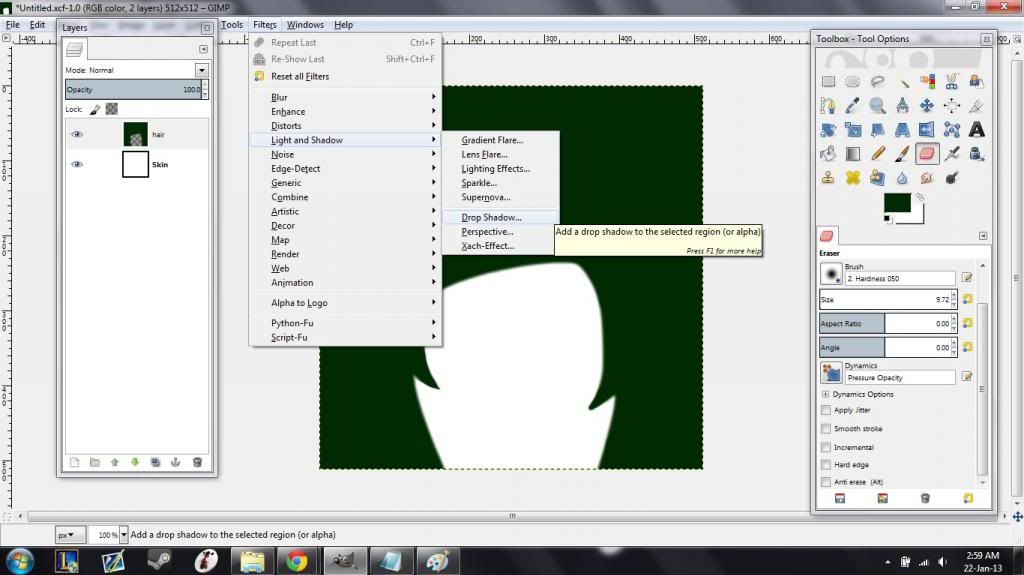
Step 11. Go to filters > Light & Shadow > Drop shadow
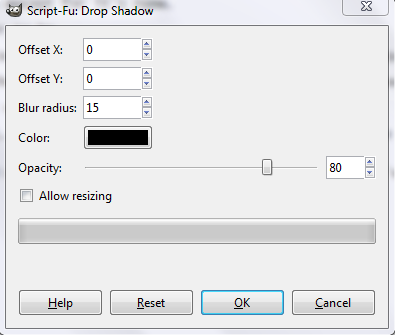
Step 12. Change the settings of the drop shadow to what I have in the picture.
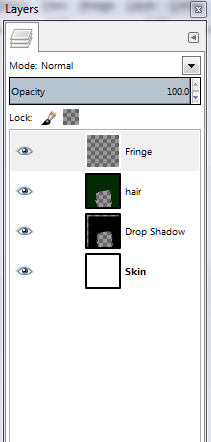
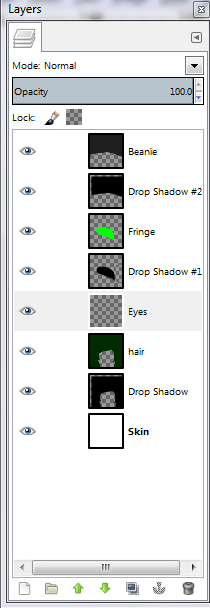
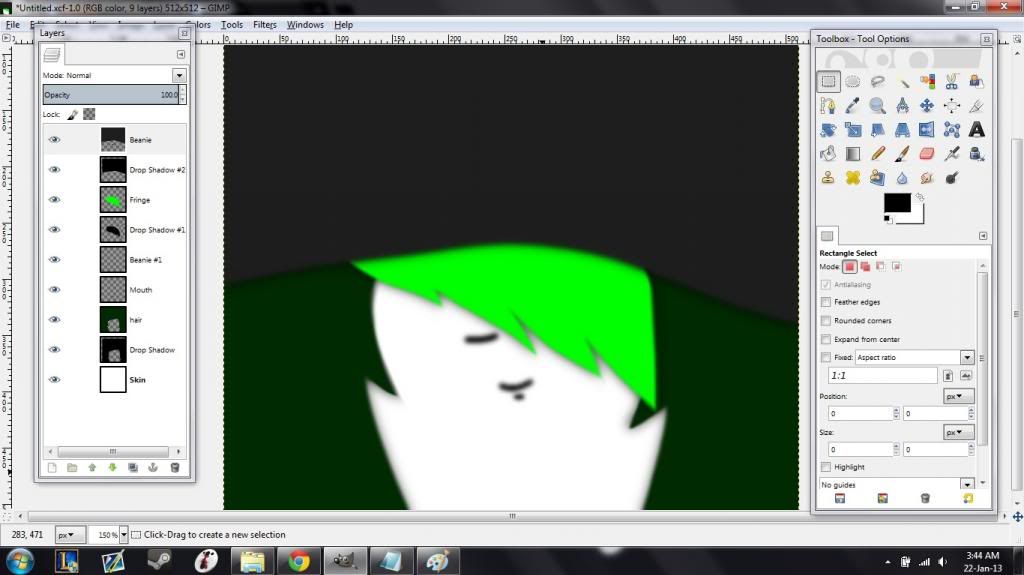
Step 13. Now add a new layer called 'Fringe'and place it at the top of the list.
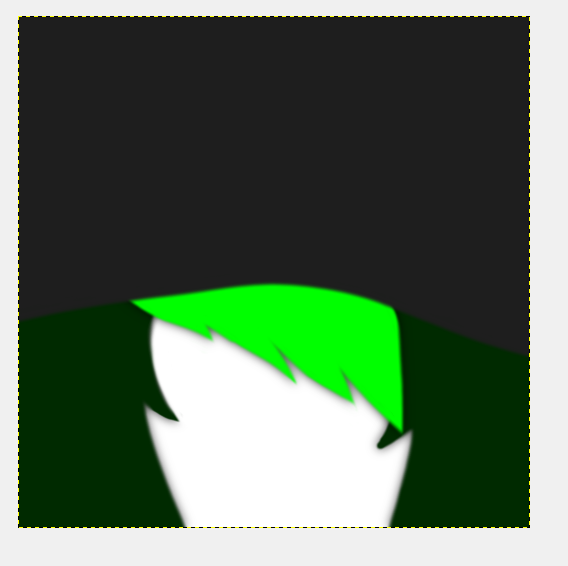
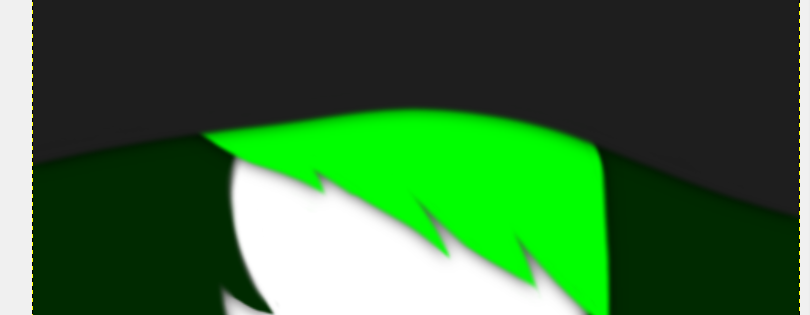
Step 14. Now re-select the paintbrush, make sure that the 'smooth stroke' is turned on and draw the outline of the fringe, it doesnt matter if you mess up the top half because we'll be putting a beanie over it shortly. I recommend using a lighter colour than the rest of the hair for the fringe. Look at the picture if you want see what I mean by "mess up".
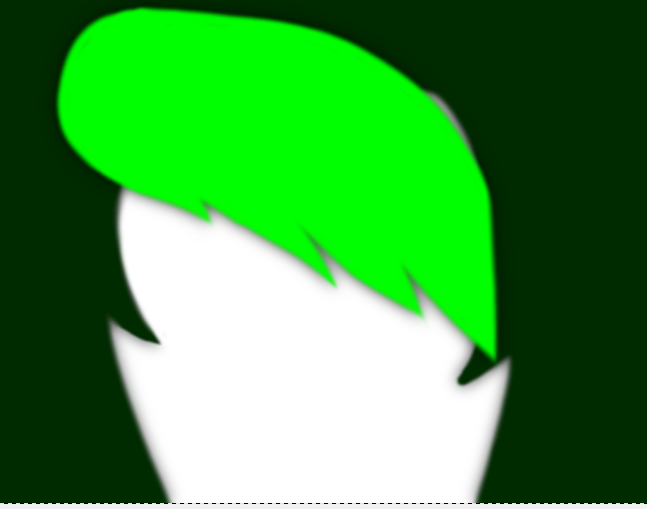
Step 15. Fill in the fringe with the colour you use to paint the outline, get rid of the leftover pixels the same way as before. You can also sharpen the edges if you really want a 'scene' look. Refer to the picture to know what I mean.
Step 16. Lets make this look realistic! Add a drop shadow to the fringe!
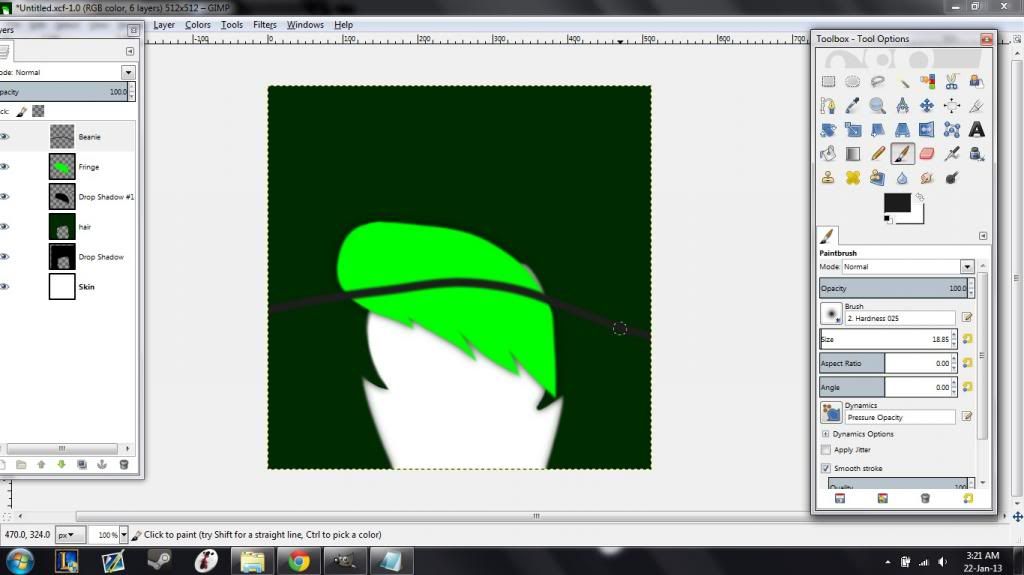
Step 17. Make a new layer called 'Beanie' and make a line with a (recommended) dark colour across the canvas like I have done in the picture.
Step 18. Fill in the beanie and remove the leftover pixels.
Step 19. Add a drop shadow to the beanie.
Step 20. Make a new layer called 'Eyes' and put it above the 'hair' layer.
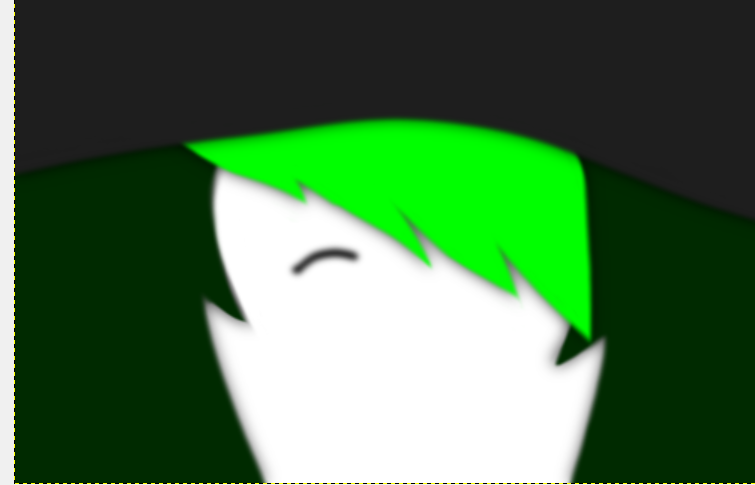
Step 21. Drawing the eyes are completely up to you, I just did a simple line and hid the other one behind the fringe.
Step 22. Draw a mouth to finish up the head and you're done!
Step 1. Open up a new document and have it 512x512 pixels with everything else as default settings.
Step 1
Step 2. Double click on the word 'background' (shown in the picture) and rename it to 'Skin' for easy reference.
Step 2
Step 3. Fill the skin layer with any solid colour. For the purposes of this tutorial, I'll leave it white.
Step 3
Step 4. Create a new layer called 'hair', don't change any settings except for it's name.
step 4
Step 5. Select the paintbrush and pick the colour you want your hair to be.
step 5
Step 6. Scroll down the settings of your paintbrush until you see 'smooth stroke'. Enable 'Smooth stroke' and put 'Quality' to 100 and 'Weight' to 250.
step 6

Step 7. Now that we have a nice smooth brush, draw the outline of the hair in one movement. Look at the picture below for reference. Remember, if you want it to be smooth then don't let go of the mouse until you finish it in one go. But you won't get it perfectly in your first try so CTRL+Z is your best friend.
step 7
Step 8. Go ahead and fill in that hair with the paint bucket. Don't worry if some white pixels are still left.
step 8
Step 9. Switch back to the paint brush and turn 'Smooth Stroke' OFF, that will make it easier for you to fill in the white pixels.
Changing the brush to a smaller size and zooming in helps.
step 9
Step 10. (OPTIONAL) If you want, you can make the brush smaller and sharpen the edges of the strands of hair like I've done.
step 10
Step 11. Go to filters > Light & Shadow > Drop shadow
step 11
Step 12. Change the settings of the drop shadow to what I have in the picture.
step 12
Step 13. Now add a new layer called 'Fringe'and place it at the top of the list.
step 13
Step 14. Now re-select the paintbrush, make sure that the 'smooth stroke' is turned on and draw the outline of the fringe, it doesnt matter if you mess up the top half because we'll be putting a beanie over it shortly. I recommend using a lighter colour than the rest of the hair for the fringe. Look at the picture if you want see what I mean by "mess up".
step 14
Step 15. Fill in the fringe with the colour you use to paint the outline, get rid of the leftover pixels the same way as before. You can also sharpen the edges if you really want a 'scene' look. Refer to the picture to know what I mean.
step 15
Step 16. Lets make this look realistic! Add a drop shadow to the fringe!
step 16
Step 17. Make a new layer called 'Beanie' and make a line with a (recommended) dark colour across the canvas like I have done in the picture.
step 17
Step 18. Fill in the beanie and remove the leftover pixels.
step 18
Step 19. Add a drop shadow to the beanie.
step 19
Step 20. Make a new layer called 'Eyes' and put it above the 'hair' layer.
step 20
Step 21. Drawing the eyes are completely up to you, I just did a simple line and hid the other one behind the fringe.
step 21
Step 22. Draw a mouth to finish up the head and you're done!
step 22
Dose is dead.


 Also, it would be great to use the pen tool for the hair and use fill for your designated color, that way no erasing is involved. Much faster and clean way to do so.