

Original Post


Advanced shading techniques.
Welcome to my second tutorial on shading with gimp.
If you are not familiar with shading, look at my first tutorial.
--------------------------------------------------------------------------
Ok today we will be making a armored robotic texture.
----------------------------------
First open gimp and do what i showed you in the last tutorial. 512x512, then the guide lines.
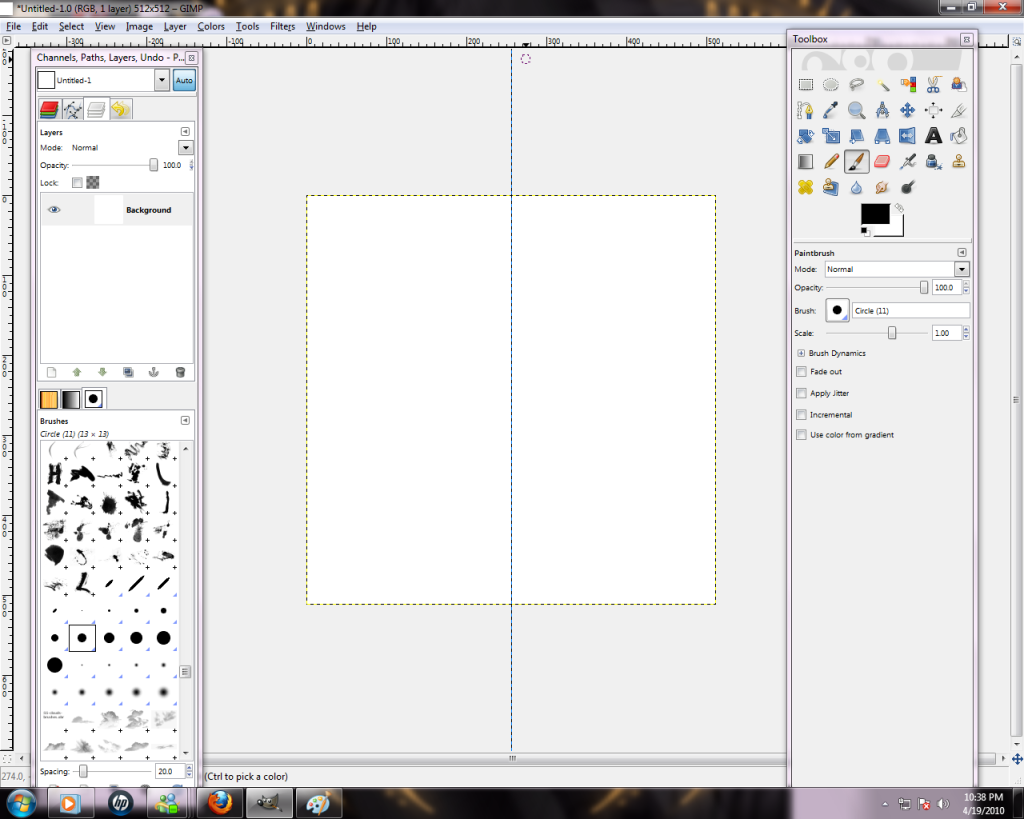
Next get your air brush and put the settings like before on it. After that we will start our design.
Start by make a simple eye shape with the air brush, hold down Shift to make straight line.
Another way to make cool designs is use the paths tool, drag the anchors to the way you like them, and then selection from path. Don't bucket fill it, just start using the air brush and make your design in it. I will use both techniques below.
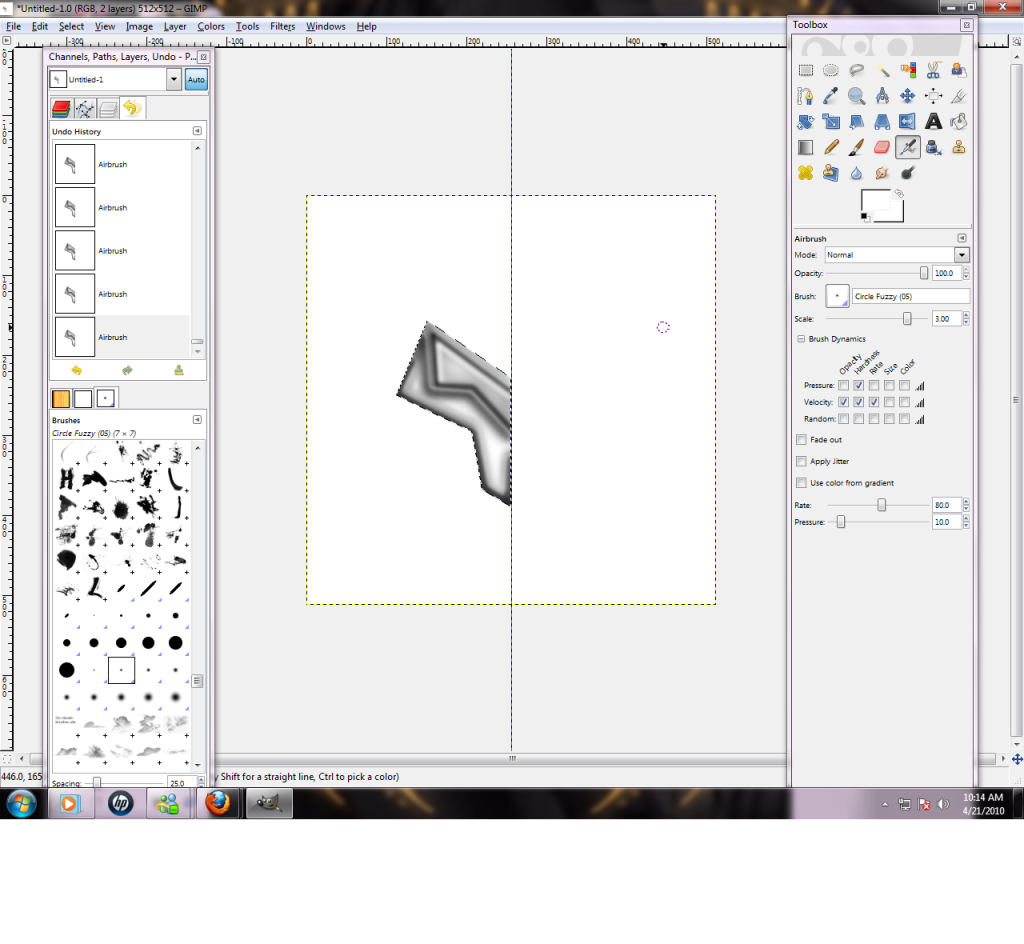
(Note: when you re doing this, if you do black and white, use a white back ground, if you use dark blue, use a light blue back ground, etc, etc. This is to keep the highlights right, that's what the back ground is for.)
Next Select none, and make another layer. You can either make another paths tool design, or just free hand it. Go ahead and finish make the design.
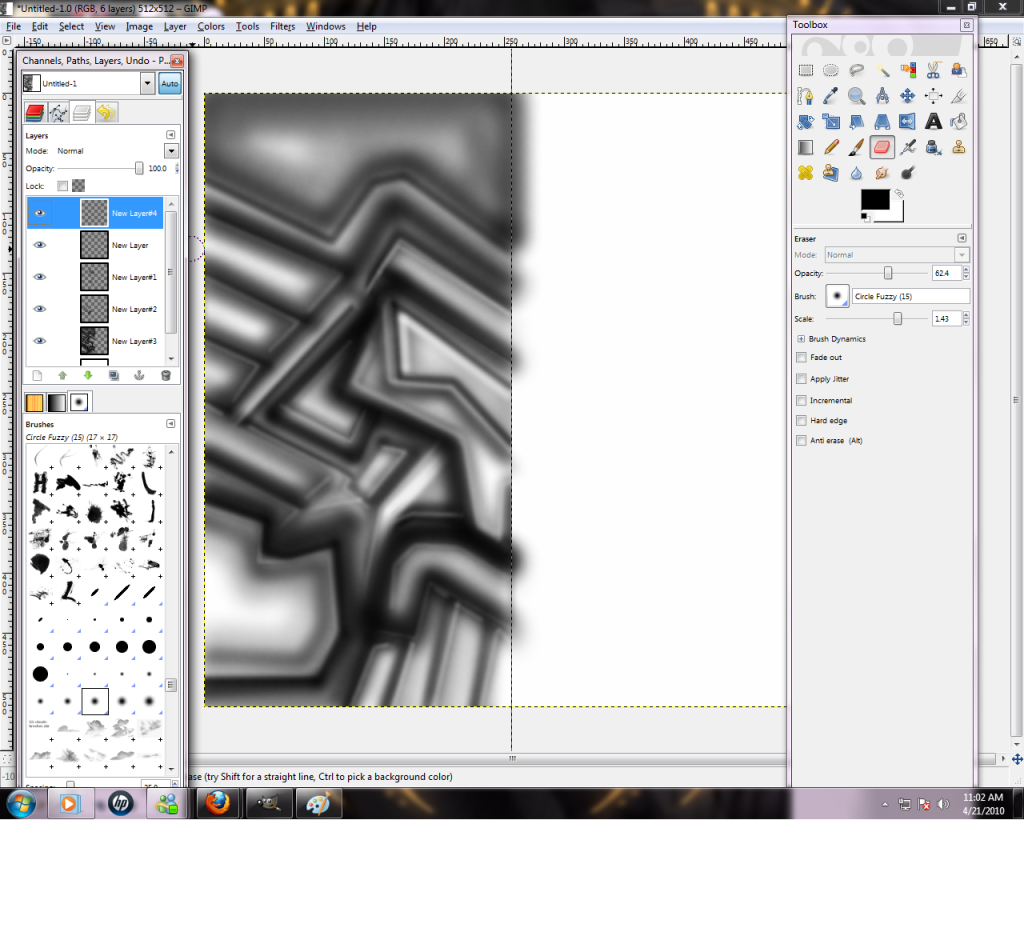
You may notice that in the above image, the design is going a bit over the line, this can be easily fixed. merge all your layers then grab your rectangle selection tool, and drag a box over the opposite side of the design, right click and click edit>cut. Should look like this.
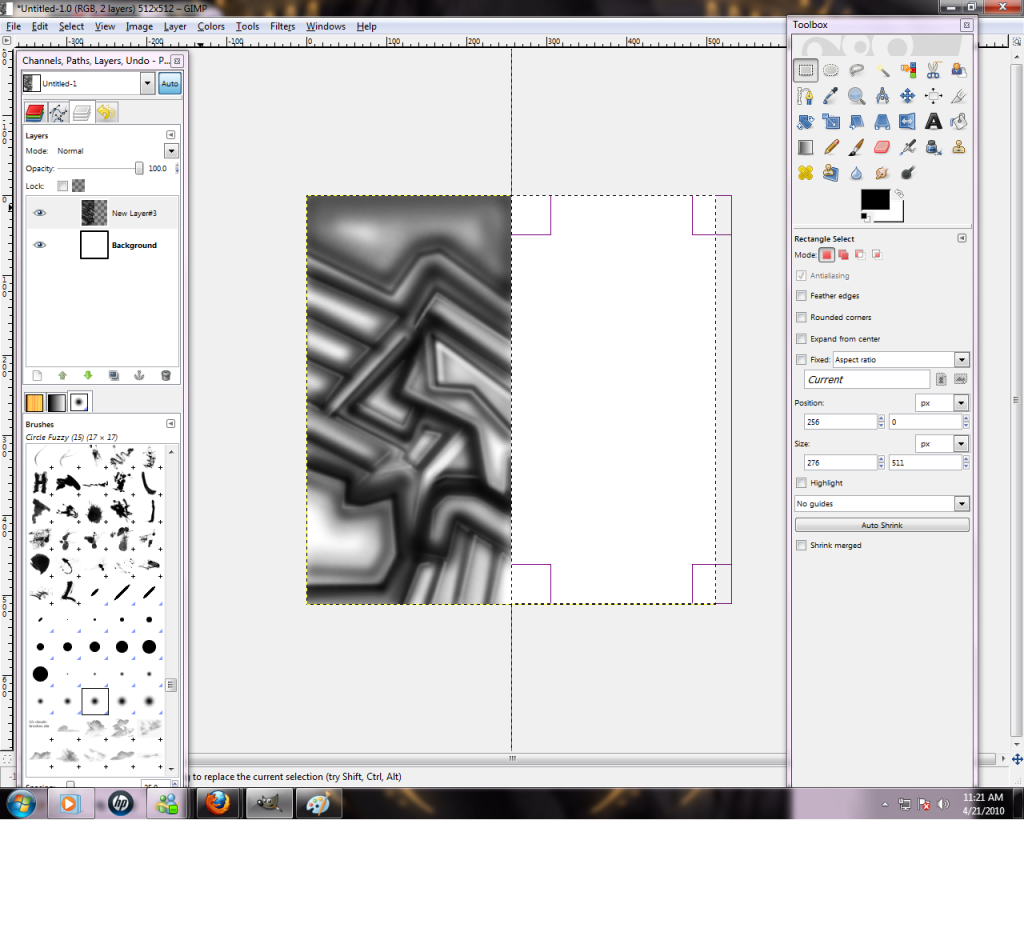
Next we meed to highlight it to make it pop, this is a very easy step. Just grab your paint brush tool, with normal settings, make a new layer, and make the fuzzy brush size match the size of the outlines on the design. use shift and drag the lines over the old layer with the design on it, use the same color for the dark lines and the same color for the lighter lines. Another way if you wanna keep that detailed look, just duplicate the layer with the design on it, and click mode: overlay.
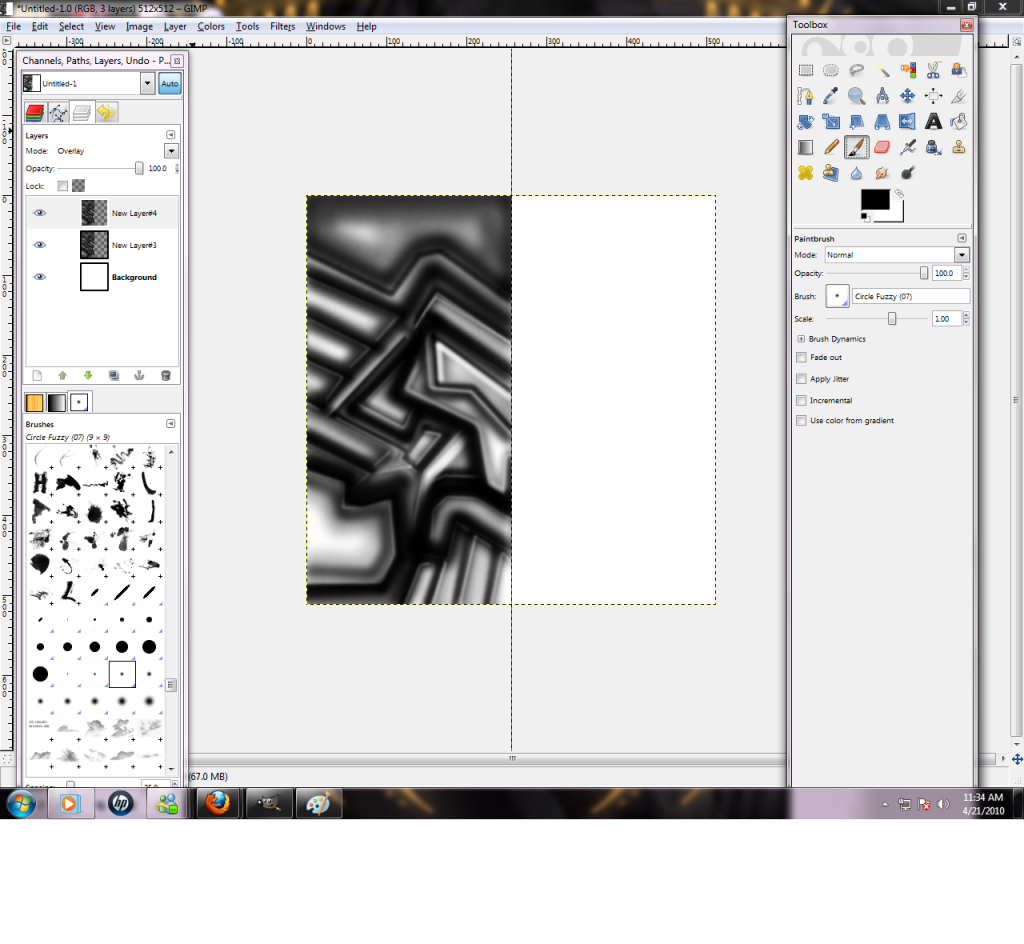
If you did the overlay version of the highlight, it will look like this.
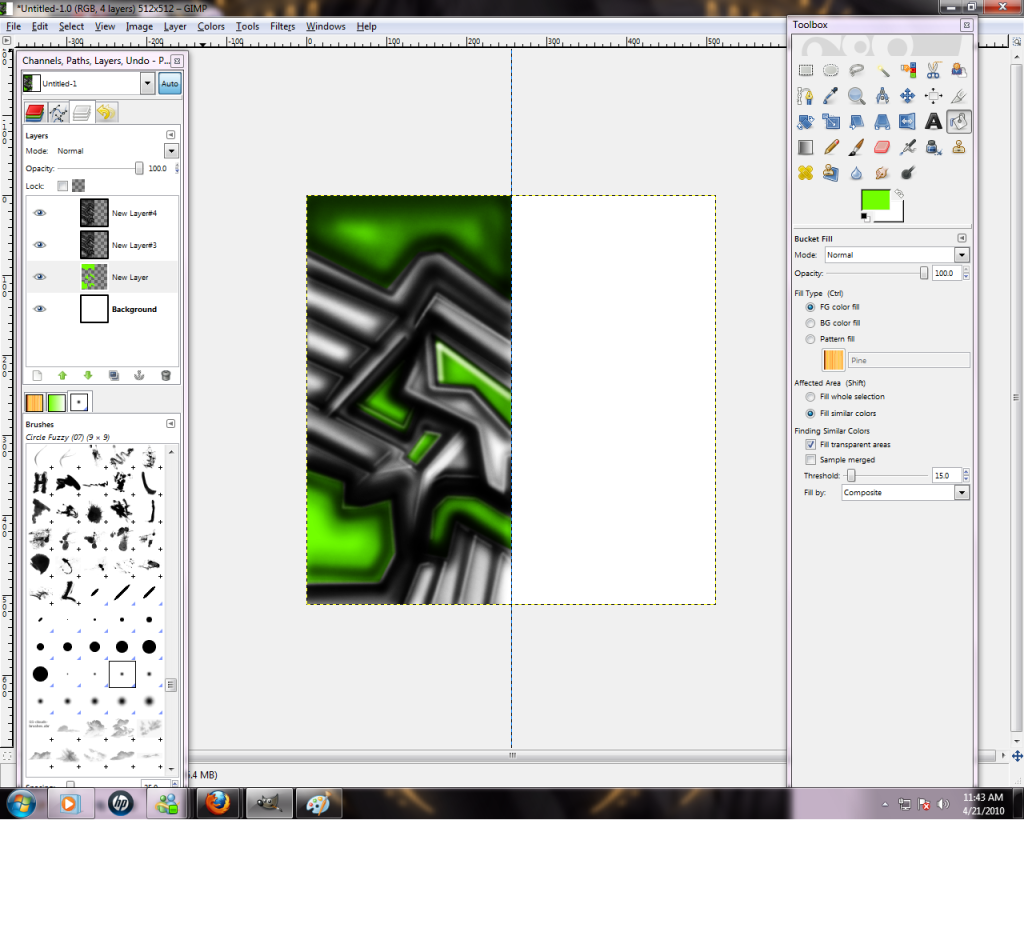
Now if you like the the black in white look skip this step, but some people may want to color it, this is simple. Make a new layer, and make sure the layer with the design on it is at the top. Grab the paths tool ,and make a selection around the area you want to color, I suggest the bigger less detailed areas. Then bucket fill with the desired color of choice.
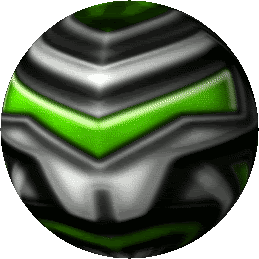
Next merge the layers, Do not merge the back ground layer however. And duplicate. Then use the flip tool to flip it. And bam, you have made a detailed robotic head.
(Note: I do realize there is a seam, didn't have time to fix sorry.)
Hope you enjoyed this tutorial, and i hope you learned something from it.
If you are not familiar with shading, look at my first tutorial.
--------------------------------------------------------------------------
Ok today we will be making a armored robotic texture.
----------------------------------
First open gimp and do what i showed you in the last tutorial. 512x512, then the guide lines.
Next get your air brush and put the settings like before on it. After that we will start our design.
Start by make a simple eye shape with the air brush, hold down Shift to make straight line.
Another way to make cool designs is use the paths tool, drag the anchors to the way you like them, and then selection from path. Don't bucket fill it, just start using the air brush and make your design in it. I will use both techniques below.
(Note: when you re doing this, if you do black and white, use a white back ground, if you use dark blue, use a light blue back ground, etc, etc. This is to keep the highlights right, that's what the back ground is for.)
Next Select none, and make another layer. You can either make another paths tool design, or just free hand it. Go ahead and finish make the design.
You may notice that in the above image, the design is going a bit over the line, this can be easily fixed. merge all your layers then grab your rectangle selection tool, and drag a box over the opposite side of the design, right click and click edit>cut. Should look like this.
Next we meed to highlight it to make it pop, this is a very easy step. Just grab your paint brush tool, with normal settings, make a new layer, and make the fuzzy brush size match the size of the outlines on the design. use shift and drag the lines over the old layer with the design on it, use the same color for the dark lines and the same color for the lighter lines. Another way if you wanna keep that detailed look, just duplicate the layer with the design on it, and click mode: overlay.
If you did the overlay version of the highlight, it will look like this.
Now if you like the the black in white look skip this step, but some people may want to color it, this is simple. Make a new layer, and make sure the layer with the design on it is at the top. Grab the paths tool ,and make a selection around the area you want to color, I suggest the bigger less detailed areas. Then bucket fill with the desired color of choice.
Next merge the layers, Do not merge the back ground layer however. And duplicate. Then use the flip tool to flip it. And bam, you have made a detailed robotic head.
(Note: I do realize there is a seam, didn't have time to fix sorry.)
Hope you enjoyed this tutorial, and i hope you learned something from it.
Last edited by Doxxy; Apr 22, 2010 at 01:38 AM.
Aka jusmi.