


Original Post


3d head making Blender (sort of advanced image heavy)
Hai!
This is my fisrt tutorial and it will contain a bit (okay, a LOT) of nerdy tech stuff, but if you have experience with 3d modeling software, this would be a great way to flex your muscles
Required software:
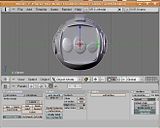
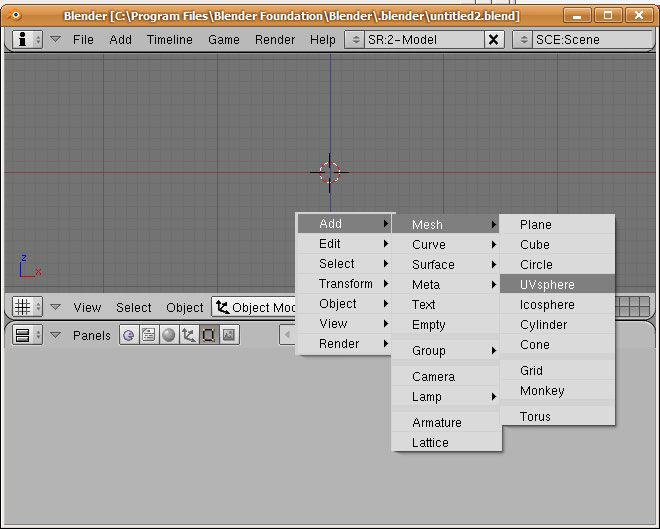
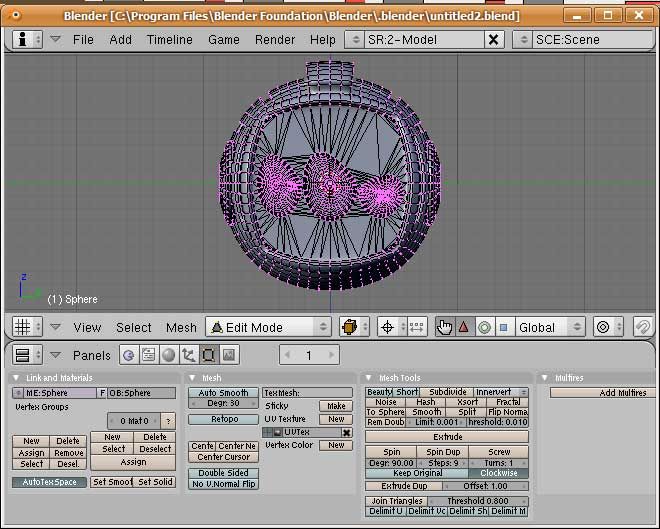
First, create a pretty highpolygon sphere.
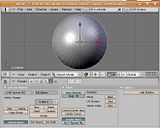
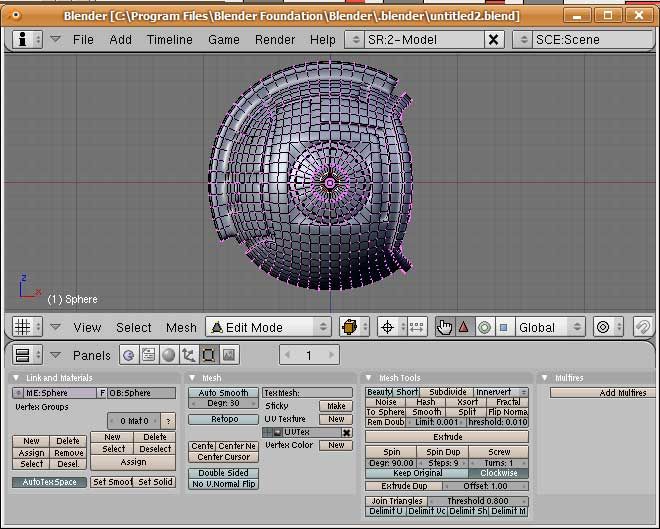
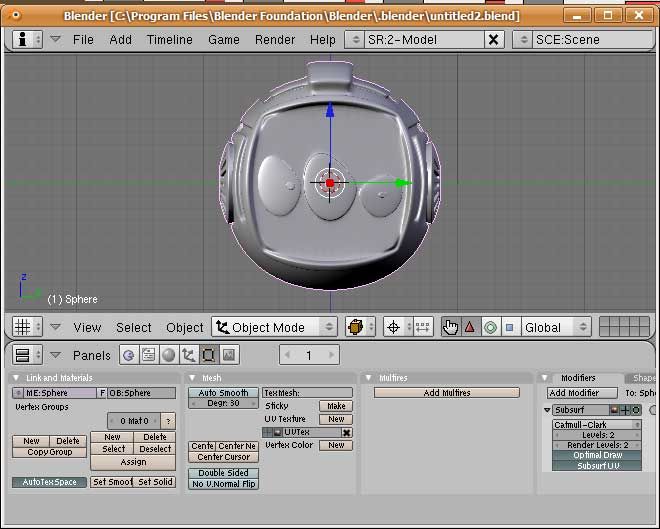
Then modify it to your heart's content, add some eyes, decoration, extrude some stuff, but keep it as one continuous mesh. There should be no holes or non-manifold vertices
To check for nonmanifold meshes in blender, press Ctrl+Alt+Shift+M Should any vertices be selected, check them and stitch them up if necessary.
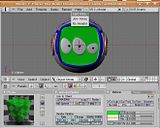
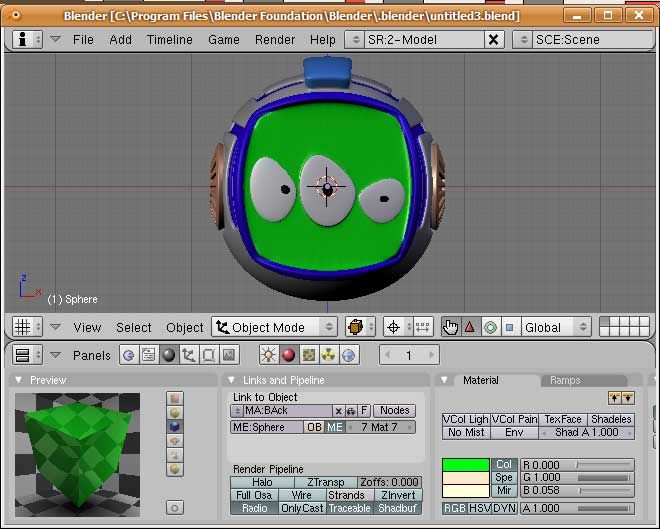
Add some materials, just basic colors would do. The rest of the coloring can be done in photoshop.

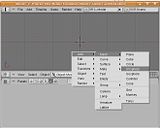
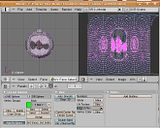
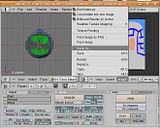
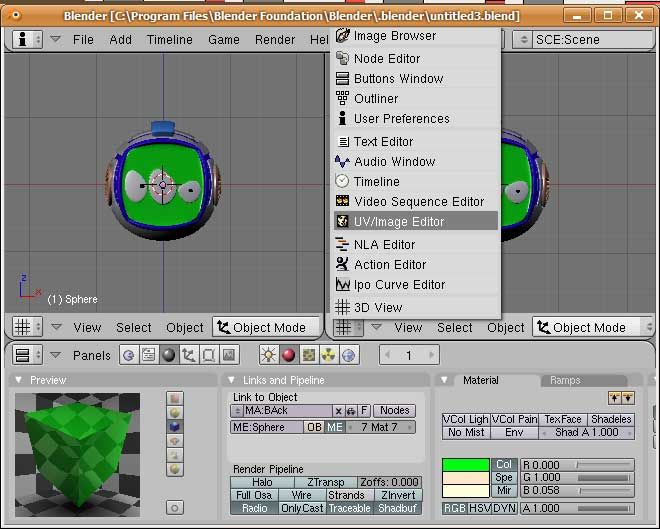
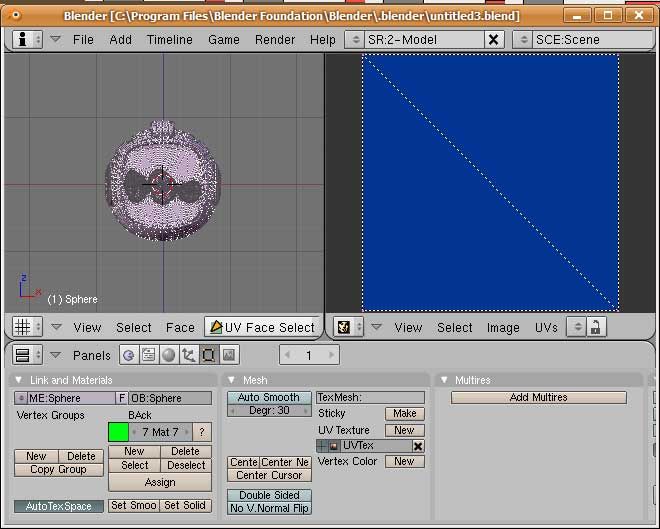
Then Unwrap your mesh. In Blender, you do this by selecting your mesh in Object mode then pressing F. Split your window if necessary and switch one window into UV/Image editor

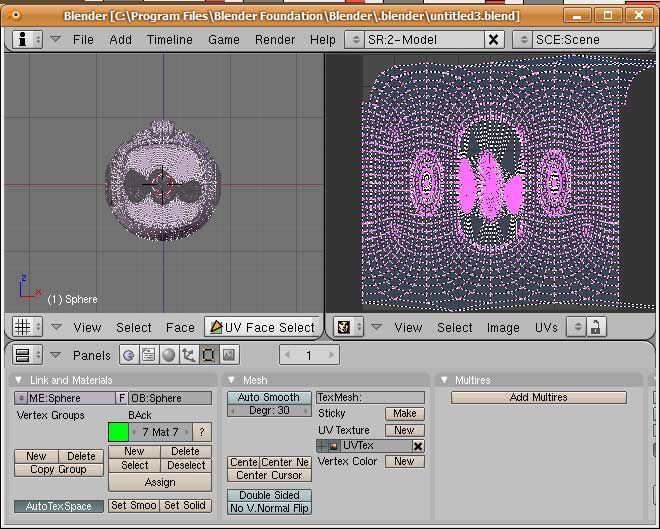
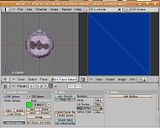 Press U and under UV Calculation, select Sphere from view. You'll see a nice unwrap done on the image editor pane.
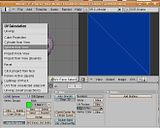
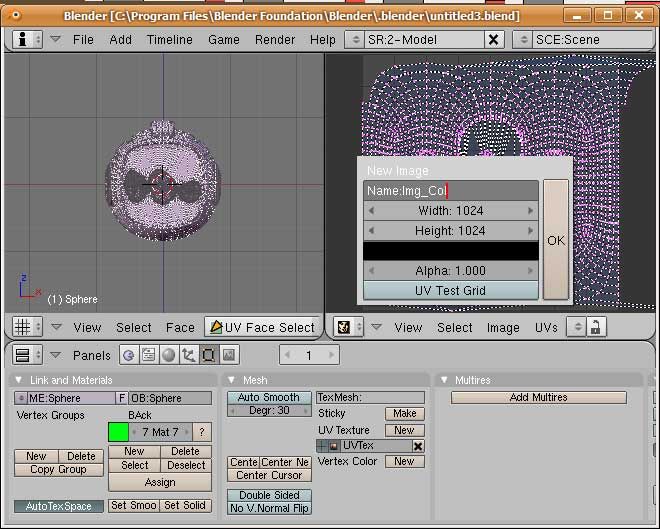
In the image editor pane, press Alt+N to create a new image. Dimensions I use are 1024x1024 to get a nonpixellated head later.
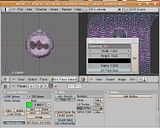
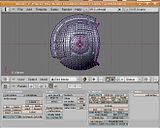
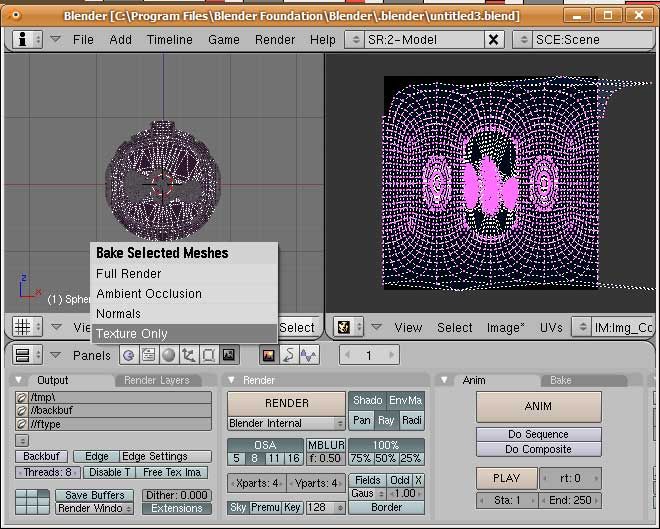
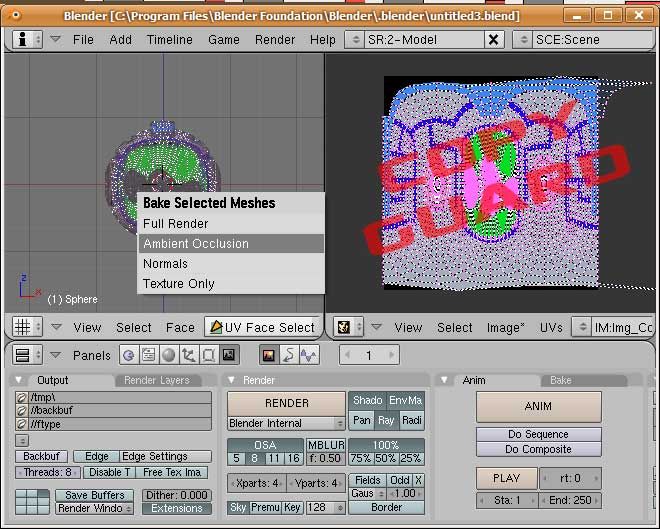
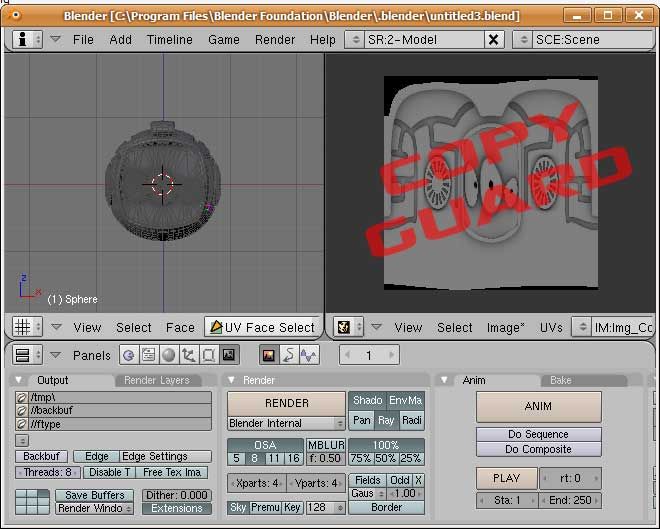
Go back to the sphere mesh and press Ctrl+Alt+B and from Bake Selected Meshes select Texture only
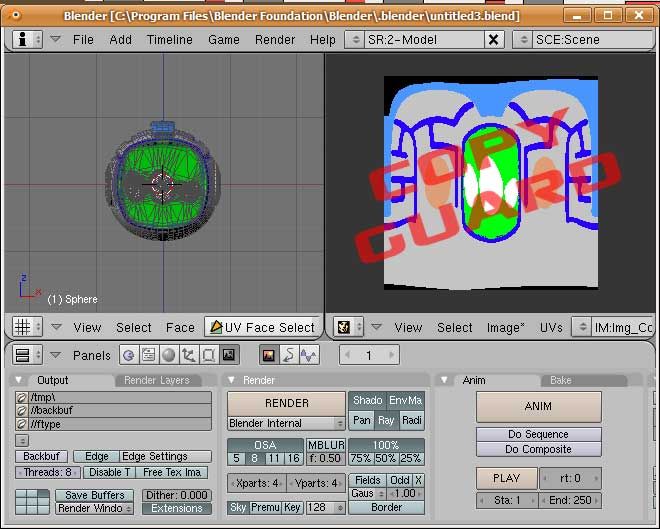
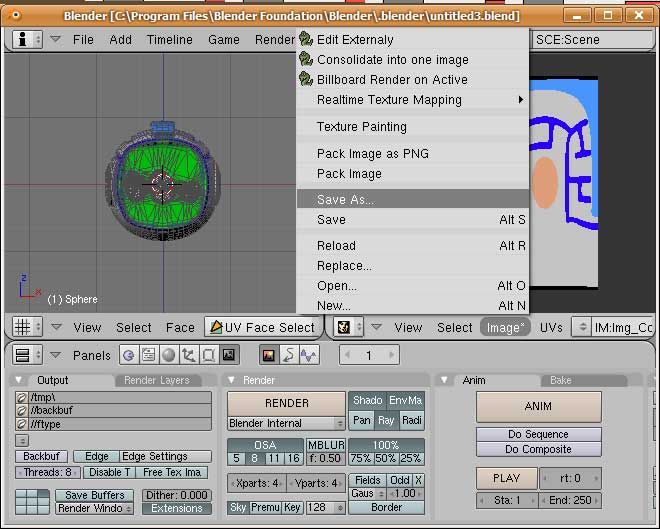
Wait a while and you'll get a nice colored picture in the image editor. Click Image Save as... and save that as Img_Col.jpg or something.
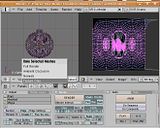
Go back to the mesh then press Ctrl+Alt+B again, this time select Ambient occlusion.
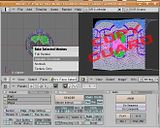
This will take a while, but this will create the internal shadows and the mesh detail for your head.
Save this image as Img_AO.jpg.
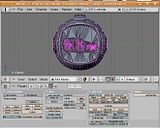
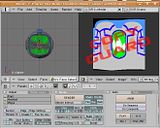
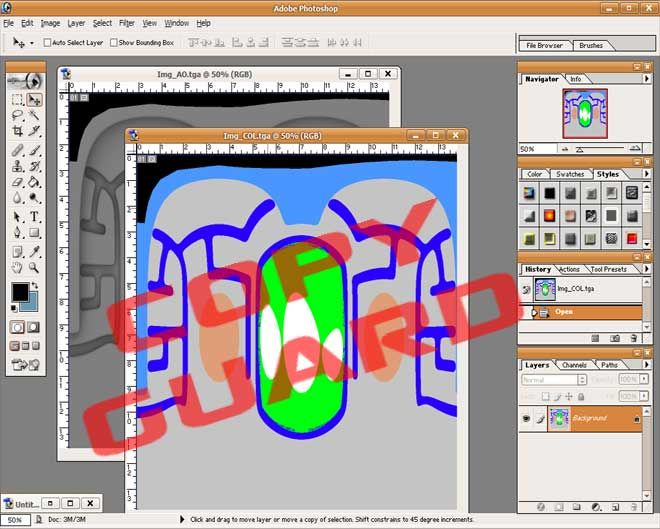
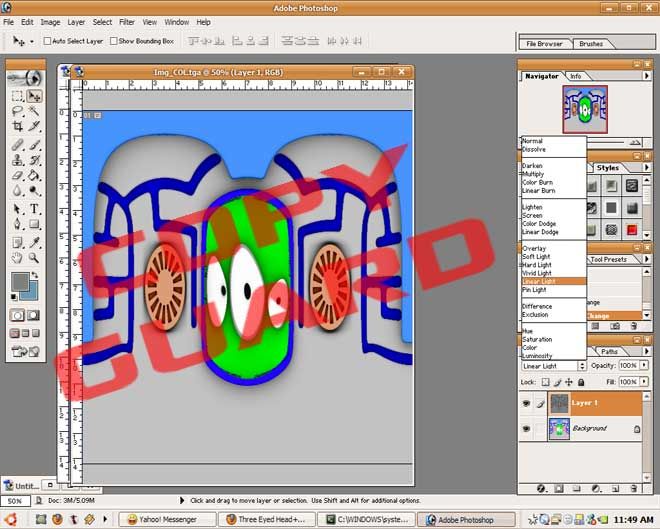
Now go to photoshop and load both images you've created

There maybe some blank areas especially in the top left corner. Try to edit them out by copy paste from the right side then flipping it horizontal.
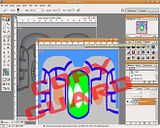
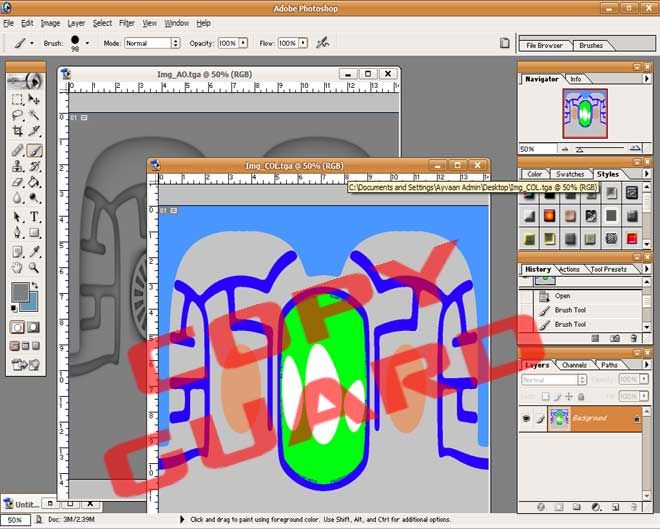
Now copy the AO image ontop of the color layer. Set the blending mode of the AO layer as Hard Light or Linear Light.
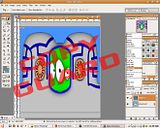
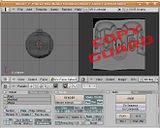
Edit it by adding text, effects, transparency etc.
Resize the image to 128x128 and check the look.
Save and viola!
This is my fisrt tutorial and it will contain a bit (okay, a LOT) of nerdy tech stuff, but if you have experience with 3d modeling software, this would be a great way to flex your muscles
Required software:
- 3D modelling app. I use Blender myeslf, but 3DSMax, Maya and C4D have the same toolset.
- Photoediting software. I use Photoshop and/or Gimp. I havent tried PSP, but it will also work
- Modeling in 3D. Just basic stuff: adding meshes, UV mapping and adding multiple materials to a mesh
- Photoediting. Adding layers, painting on textures, editing layer properties
First, create a pretty highpolygon sphere.
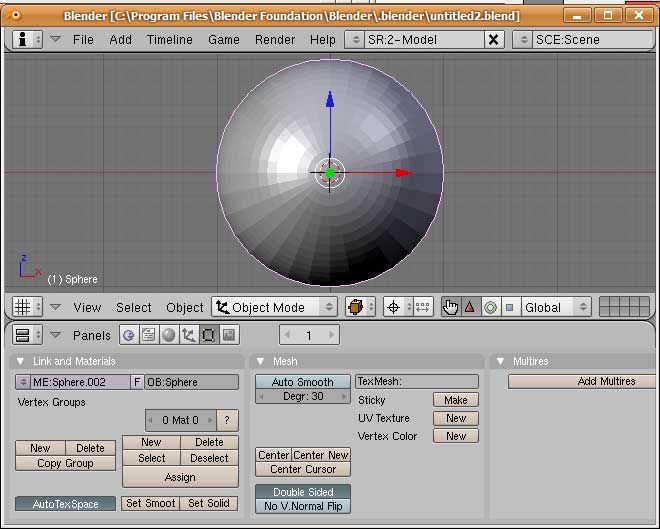
Then modify it to your heart's content, add some eyes, decoration, extrude some stuff, but keep it as one continuous mesh. There should be no holes or non-manifold vertices
To check for nonmanifold meshes in blender, press Ctrl+Alt+Shift+M Should any vertices be selected, check them and stitch them up if necessary.
Add some materials, just basic colors would do. The rest of the coloring can be done in photoshop.
Then Unwrap your mesh. In Blender, you do this by selecting your mesh in Object mode then pressing F. Split your window if necessary and switch one window into UV/Image editor
 Press U and under UV Calculation, select Sphere from view. You'll see a nice unwrap done on the image editor pane.
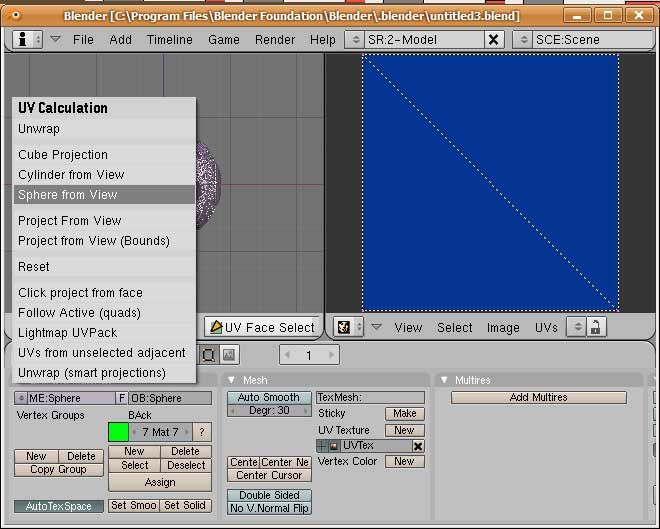
In the image editor pane, press Alt+N to create a new image. Dimensions I use are 1024x1024 to get a nonpixellated head later.
Go back to the sphere mesh and press Ctrl+Alt+B and from Bake Selected Meshes select Texture only
Wait a while and you'll get a nice colored picture in the image editor. Click Image Save as... and save that as Img_Col.jpg or something.
Go back to the mesh then press Ctrl+Alt+B again, this time select Ambient occlusion.
This will take a while, but this will create the internal shadows and the mesh detail for your head.
Save this image as Img_AO.jpg.
Now go to photoshop and load both images you've created
There maybe some blank areas especially in the top left corner. Try to edit them out by copy paste from the right side then flipping it horizontal.
Now copy the AO image ontop of the color layer. Set the blending mode of the AO layer as Hard Light or Linear Light.
Edit it by adding text, effects, transparency etc.
Resize the image to 128x128 and check the look.
Save and viola!
...

«
Previous Thread
|
Next Thread
»