

Original Post


Terragen Tutorial
Well this seemed fairly popular in the arts thread... anyways, terragen is a free world making program that allows you to create different kinds of environments using a generator and a number of control panels that allow you to manipulate the landscape, waterscape, cloudscape, atmosphere, lighting conditions, and rendering controls. So some people are having a bit of trouble with it and i thought I'd post a tutorial.
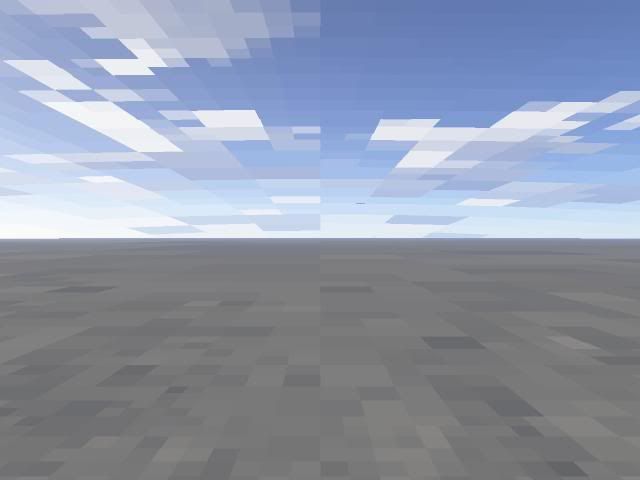
So. When you start off with a new world and you preview the render, you get something like this:
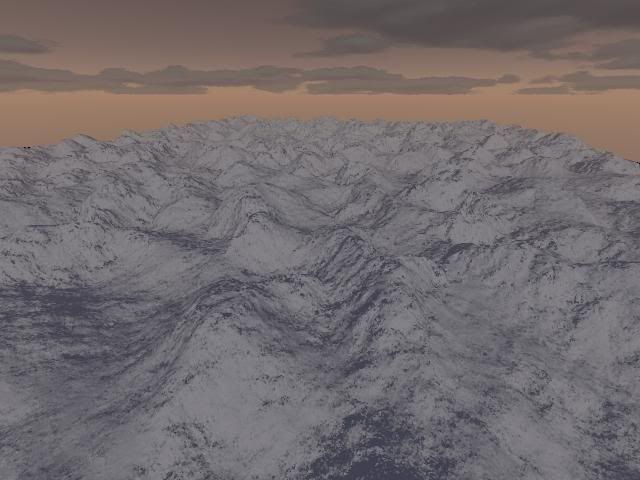
How do you turn that into something like this?
Well i have an easy 6 step tutorial for you guys ( Note that it's only for pure land creations, adding on water or a specific light theme would require a lot more work )
STEP NUMBER ONE
Alright for the first step, go to the sidebar and click "landscape". Click "generate landscape" and a few options come up, which are Smoothing, Glaciation, Canyonism, and Realism. Set these values to whatever you need for your world- canyons and glaciations will make more mountainous and valley themes for you, whereas low values of these will produce foothills or fields. So. Lets say i want to make an arctic/snow theme. Well, to create the little foothills of snow, I'd set glaciation and canyonism values to between 10-25 to get those little foothills. I'd set up smoothness and realism to the max to make the snow look more realistic and finally, hit "Generate Terrain." After this a random generator will place land at different heights and slopes. Next, I'd go to the Edit button on the side bar of the Landscape panel and set the color bars to a high and equal value so they'd be white, then increase the blue value a little bit to make the snow a bit darker and realistic. There's also a bumpiness setting- this I would set low because I'm doing snow.
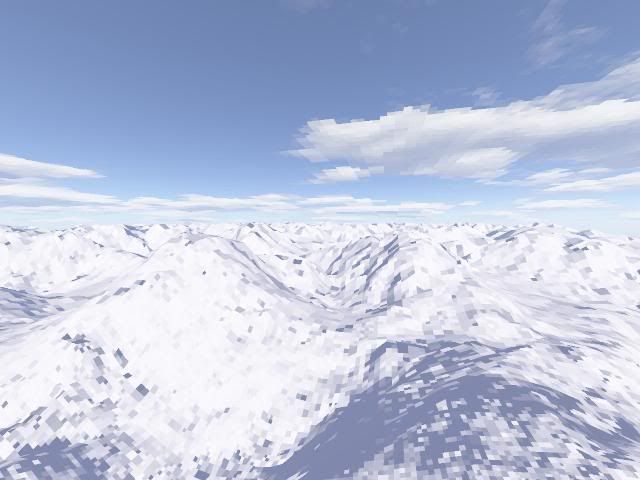
So after the first step, my 'world' would resemble this.
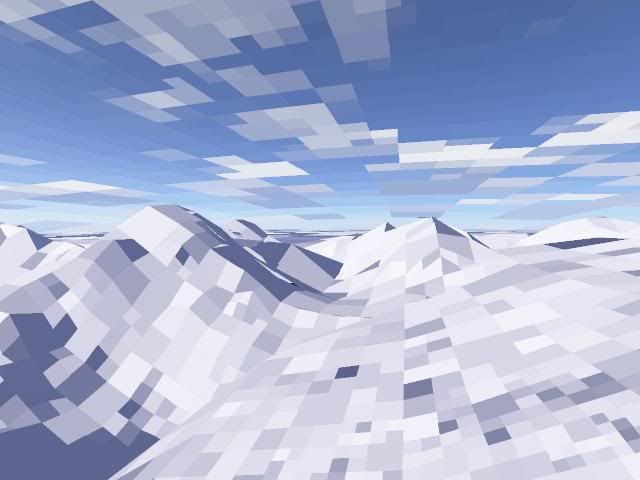
Pretty huh? Well it's not anywhere near finished quality.
STEP NUMBER TWO
After step number one, you want to set the rendering and detail bars a little higher and do some culling to get the quality a bit better. Now, the camera positioning. look on the tiny map in the lower left corner of the Rendering Controls panel. The darker something is, the higher up it is. Use this knowledge to position your camera into the right spot. Once you are in the same general area after using the mouse, use the side bar values to get the view even more precise. If you want a ground view, set the height low and the pitch low. if you want an aerial view, set the height high and the pitch high. ( BTW the pitch is in negative values... so low pitch would be -10 and high pitch would be -50. Got it? ) I want an aerial view, so i do that.
STEP NUMBER THREE
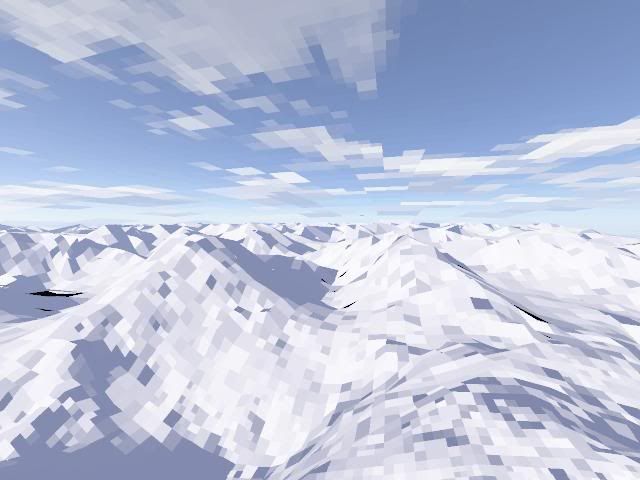
Alright, render the scene a little more and put detail up a little higher. Now we are about at medium quality and almost half-way finished. For this step, what you want to do is go to the cloudscape settings. Select the thickness or depth you want for your clouds ( a low depth would be like a stratus cloud whereas an extremely high depth would be like an altostratus or cumulusnimbus cloud. ) and then select if you want 2-D or 3-D clouds. Go to the generate clouds option and select how often you want clouds to appear and how big the largest cloud can be. Hit "Generate" to make a new set of clouds. After every generation, preview the render to see if the clouds are where you want them. Keep fiddling with it until it satisfies you.
STEP NUMBER FOUR
Now it's time for the advanced atmospheric settings. Go to the atmospheric settings sidebar and you will see 3 bars in the control panel that pops up. One is simple haze, one is atmospheric blue, and one is light decay. Hit the Edit Color buttons next to each bar to change the color that you want for that area, and then use the scroll bars density, decay, and half-height to set the various atmospheric conditions. If you want a morning setting, try putting the blue at a lighter shade and the decay almost non-existent- the haze could be watery if you want mist or dew, or it could be orang-ish if you want a dawn setting. I want a late evening setting, but not nighttime or dusk, so I'm going to go with a light red for now.

STEP NUMBER FIVE
Alright. Professionally advanced lighting conditions and atmospheric settings time. If you go to the light settings, you will find that you have control panels to manipulate the sun's position, altitude, heading, size, strength, and color. You will also be able to control shadows that occur in your world and be able to change direct sunlight color, background light, and atmospheric light. All of these have many options that can be tweaked. For me, I think I want to lower exposure a bit and get some gradient hazes in the background, and i wanna darken those clouds some.
STEP NUMBER SIX
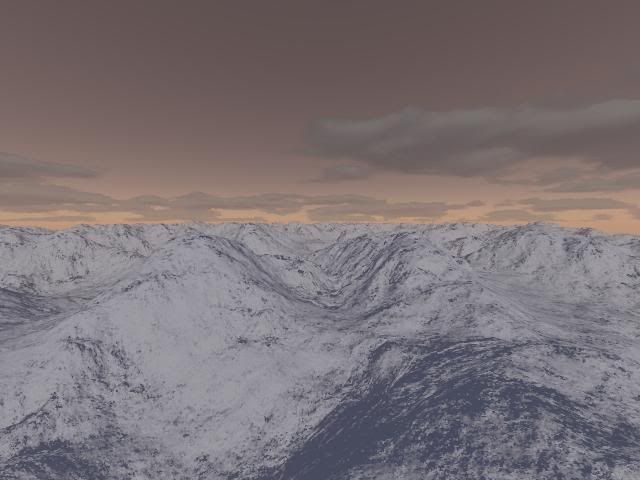
Final step. This is basically refurbishment time. Go back over all the panels and cull, check for mistakes, etc. I found I wanted a view over a larger area, so I raised the camera height to 700 and increased the pitch for an aerial view. I edited the shadows and atmosphere a bit more and got this product:
Arctic Fields
Well it's not super detailed, but i can see that scroll bar is small enough as it is. I would post pictures of it happening in the program and the different control panels, but it would probably require hundreds just to get a general and not very clear idea across, so i have to settle with some verbal explanations :P
Comments and thoughts?
(also, was the right place to post? Nothing here said it had to be toribash related but if it's not, I'd appreciate it if a mod could move it to Art)
So. When you start off with a new world and you preview the render, you get something like this:
How do you turn that into something like this?
Well i have an easy 6 step tutorial for you guys ( Note that it's only for pure land creations, adding on water or a specific light theme would require a lot more work )
STEP NUMBER ONE
Alright for the first step, go to the sidebar and click "landscape". Click "generate landscape" and a few options come up, which are Smoothing, Glaciation, Canyonism, and Realism. Set these values to whatever you need for your world- canyons and glaciations will make more mountainous and valley themes for you, whereas low values of these will produce foothills or fields. So. Lets say i want to make an arctic/snow theme. Well, to create the little foothills of snow, I'd set glaciation and canyonism values to between 10-25 to get those little foothills. I'd set up smoothness and realism to the max to make the snow look more realistic and finally, hit "Generate Terrain." After this a random generator will place land at different heights and slopes. Next, I'd go to the Edit button on the side bar of the Landscape panel and set the color bars to a high and equal value so they'd be white, then increase the blue value a little bit to make the snow a bit darker and realistic. There's also a bumpiness setting- this I would set low because I'm doing snow.
So after the first step, my 'world' would resemble this.
Pretty huh? Well it's not anywhere near finished quality.
STEP NUMBER TWO
After step number one, you want to set the rendering and detail bars a little higher and do some culling to get the quality a bit better. Now, the camera positioning. look on the tiny map in the lower left corner of the Rendering Controls panel. The darker something is, the higher up it is. Use this knowledge to position your camera into the right spot. Once you are in the same general area after using the mouse, use the side bar values to get the view even more precise. If you want a ground view, set the height low and the pitch low. if you want an aerial view, set the height high and the pitch high. ( BTW the pitch is in negative values... so low pitch would be -10 and high pitch would be -50. Got it? ) I want an aerial view, so i do that.
STEP NUMBER THREE
Alright, render the scene a little more and put detail up a little higher. Now we are about at medium quality and almost half-way finished. For this step, what you want to do is go to the cloudscape settings. Select the thickness or depth you want for your clouds ( a low depth would be like a stratus cloud whereas an extremely high depth would be like an altostratus or cumulusnimbus cloud. ) and then select if you want 2-D or 3-D clouds. Go to the generate clouds option and select how often you want clouds to appear and how big the largest cloud can be. Hit "Generate" to make a new set of clouds. After every generation, preview the render to see if the clouds are where you want them. Keep fiddling with it until it satisfies you.
STEP NUMBER FOUR
Now it's time for the advanced atmospheric settings. Go to the atmospheric settings sidebar and you will see 3 bars in the control panel that pops up. One is simple haze, one is atmospheric blue, and one is light decay. Hit the Edit Color buttons next to each bar to change the color that you want for that area, and then use the scroll bars density, decay, and half-height to set the various atmospheric conditions. If you want a morning setting, try putting the blue at a lighter shade and the decay almost non-existent- the haze could be watery if you want mist or dew, or it could be orang-ish if you want a dawn setting. I want a late evening setting, but not nighttime or dusk, so I'm going to go with a light red for now.
STEP NUMBER FIVE
Alright. Professionally advanced lighting conditions and atmospheric settings time. If you go to the light settings, you will find that you have control panels to manipulate the sun's position, altitude, heading, size, strength, and color. You will also be able to control shadows that occur in your world and be able to change direct sunlight color, background light, and atmospheric light. All of these have many options that can be tweaked. For me, I think I want to lower exposure a bit and get some gradient hazes in the background, and i wanna darken those clouds some.
STEP NUMBER SIX
Final step. This is basically refurbishment time. Go back over all the panels and cull, check for mistakes, etc. I found I wanted a view over a larger area, so I raised the camera height to 700 and increased the pitch for an aerial view. I edited the shadows and atmosphere a bit more and got this product:
Arctic Fields
Well it's not super detailed, but i can see that scroll bar is small enough as it is. I would post pictures of it happening in the program and the different control panels, but it would probably require hundreds just to get a general and not very clear idea across, so i have to settle with some verbal explanations :P
Comments and thoughts?
(also, was the right place to post? Nothing here said it had to be toribash related but if it's not, I'd appreciate it if a mod could move it to Art)
Last edited by Ragdollmaster; Dec 23, 2007 at 03:35 AM.
How to complain in style: GG, Mahulk.
You should call it beginners tutorial. I learned this stuff in a few min, but it will deffinetally help someone. Good job.
Also, I can add some stuff later, if you want.
Also, I can add some stuff later, if you want.
Last edited by Samule; Dec 23, 2007 at 05:37 AM.
<PlayerID666> samule is the coolest guy around

ya.....its more of a begginers tut.....i learned this in like 10min....but it will help those clueless people and stuff... add more stuff like Samule said
<Shlimby> lol, no Ad, just stop seeing those melons
<ADTerminal> Sure
<Shlimby> and dont take them into ur bed at night
<ADTerminal> But it's where I keep them warm
<ADTerminal> Sure
<Shlimby> and dont take them into ur bed at night
<ADTerminal> But it's where I keep them warm